Building and Deploying with a Custom Dockerfile
Flightcontrol can build an individual service (web server or worker) using a Dockerfile that you provide in the Git repository. This could be useful if your project has complicated build requirements, or if you already have a Dockerfile that you use to build your application.
Custom Dockerfiles are one of three build type options for Flightcontrol - the other two are Nixpacks and using a pre-built Docker image from a registry - such as Docker Hub, GitHub Container Registry or Amazon Elastic Container Registry (ECR).
In this guide, we’ll walk through the steps to get your project deployed to AWS using a custom Dockerfile.
Prerequisites
You’ll need the following before you begin:
- A Git repository (public or private) with your source code and a valid Dockerfile
- An AWS account - Create an account
- A Flightcontrol account - Create an account
Configuring your Project
To use a custom Dockerfile, start a new project on Flightcontrol and choose your Git repository. Once you choose a repository, you can configure your Flightcontrol project.

Fill in your project name, choose your AWS account, and then select an available AWS region.
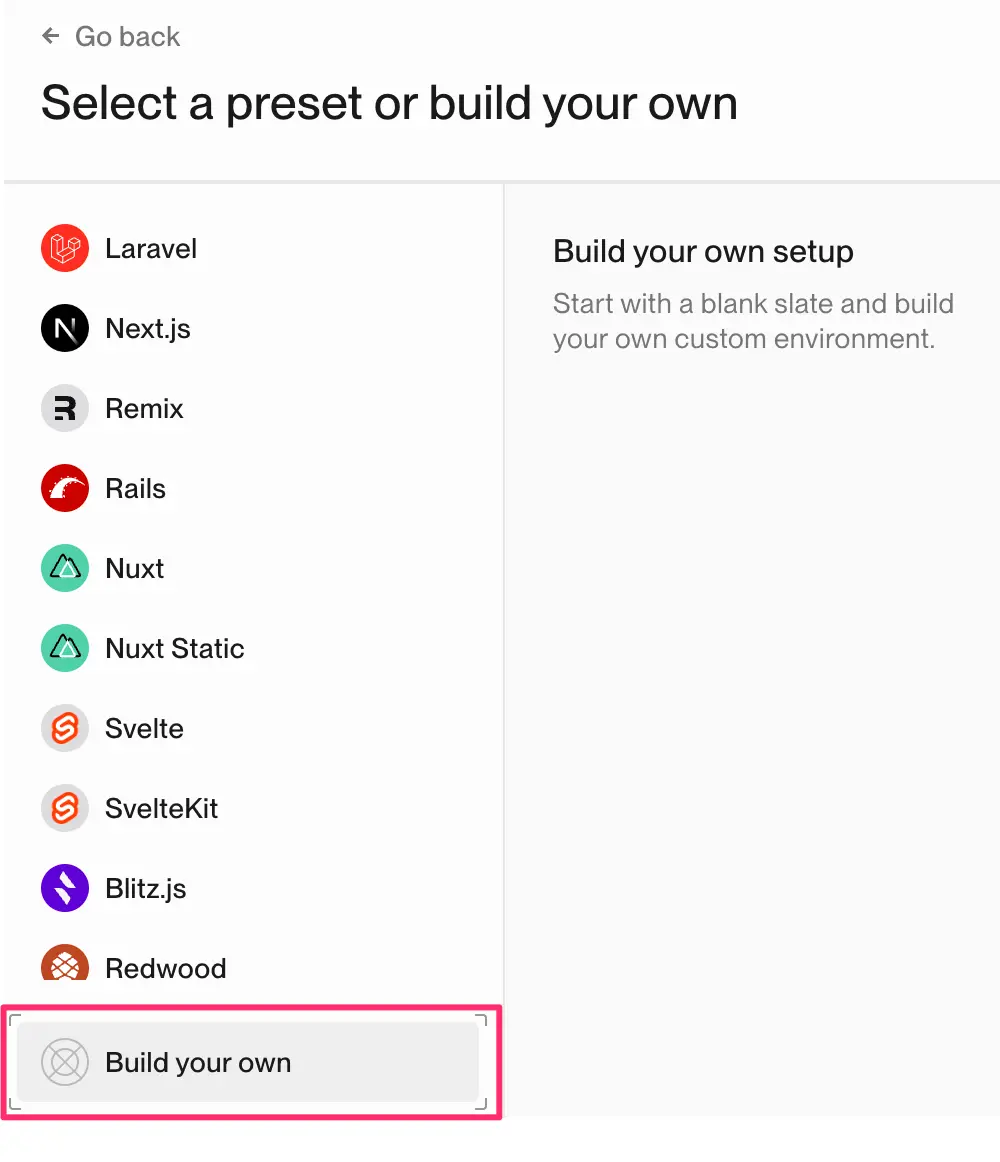
Click the Next button to continue. You will get a list of presets to choose from - for this guide, we’ll need to choose the Build your own option at the bottom of the dialog box.

Click Build your own to continue.
Adding a Web Server Service
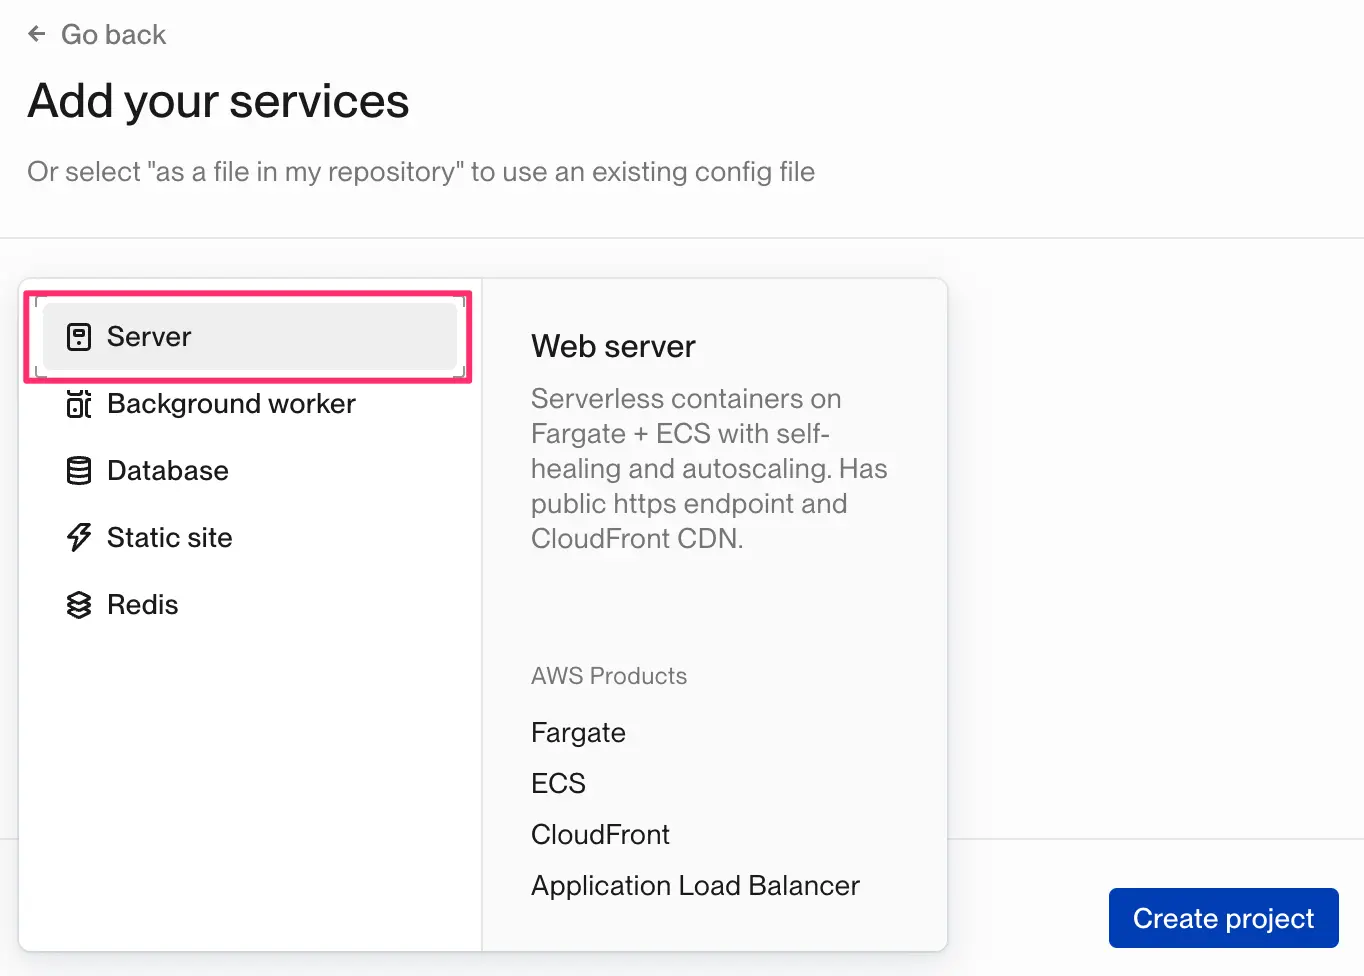
On the next screen, you’ll see the option to add services. We will add a Server service, which is for a web application that runs on an HTTP port. Other service options include workers, static sites, databases, and Redis servers.

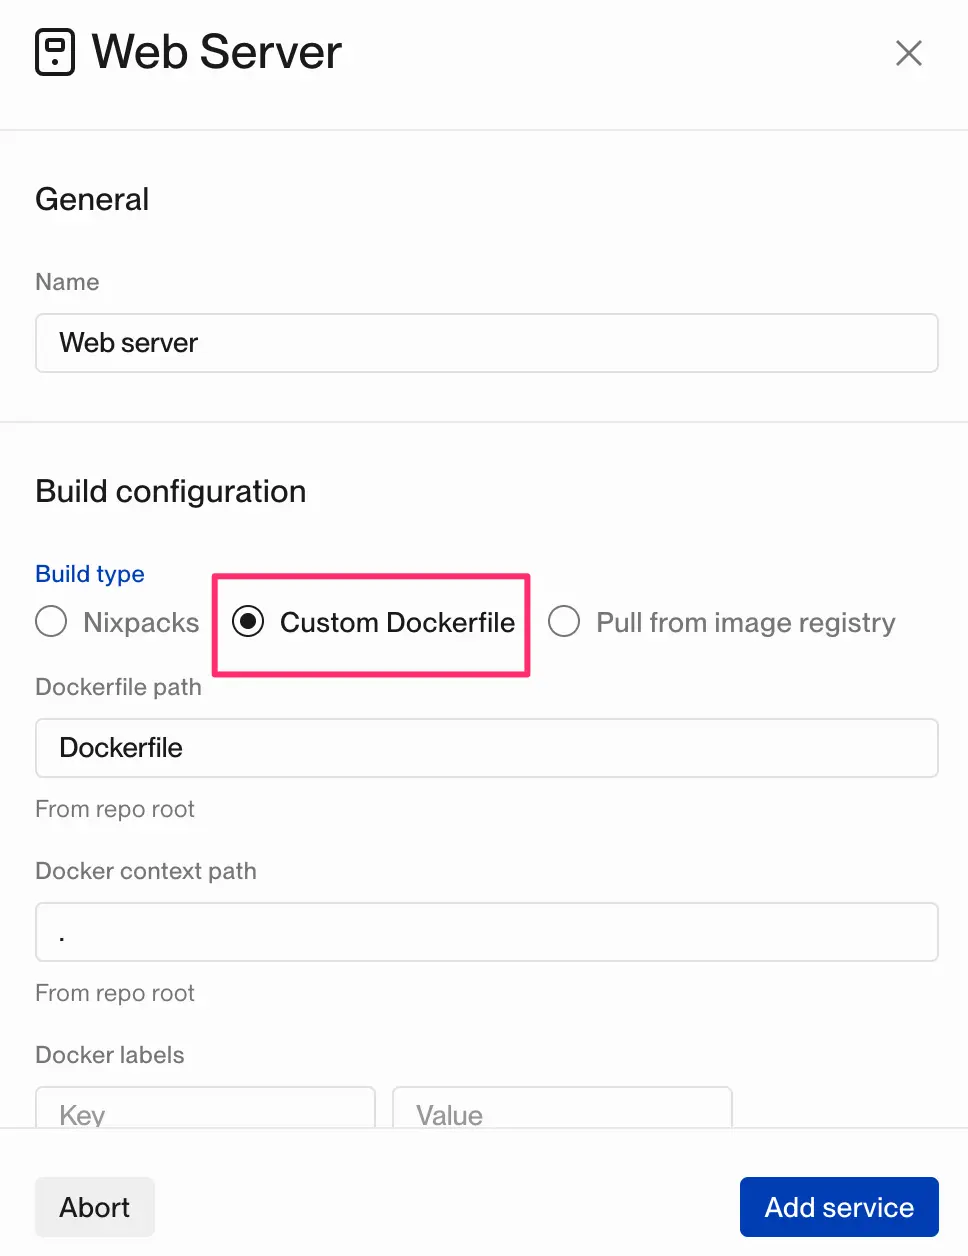
After choosing a Server service, the Web Server dialog appears with configuration options. The most important configuration option for the purpose of this guide is the Build type. The default build type is Nixpacks, which would build your application for you. To use your own Dockerfile, select the Custom Dockerfile build type option, as seen in the following screenshot:

If you need to use a custom path for the Dockerfile - for instance, because it is in a subdirectory in a monorepo, you can configure that here. You should also check the HTTP port (the default is 3000) to make sure it matches your Dockerfile - once this is set, it cannot be changed without recreating the service. Other options include the instance size for the server, the health check URL, and the Docker context path.
Once you have the Web Server service configured, click Add service to continue.
Deploying the Project with Flightcontrol
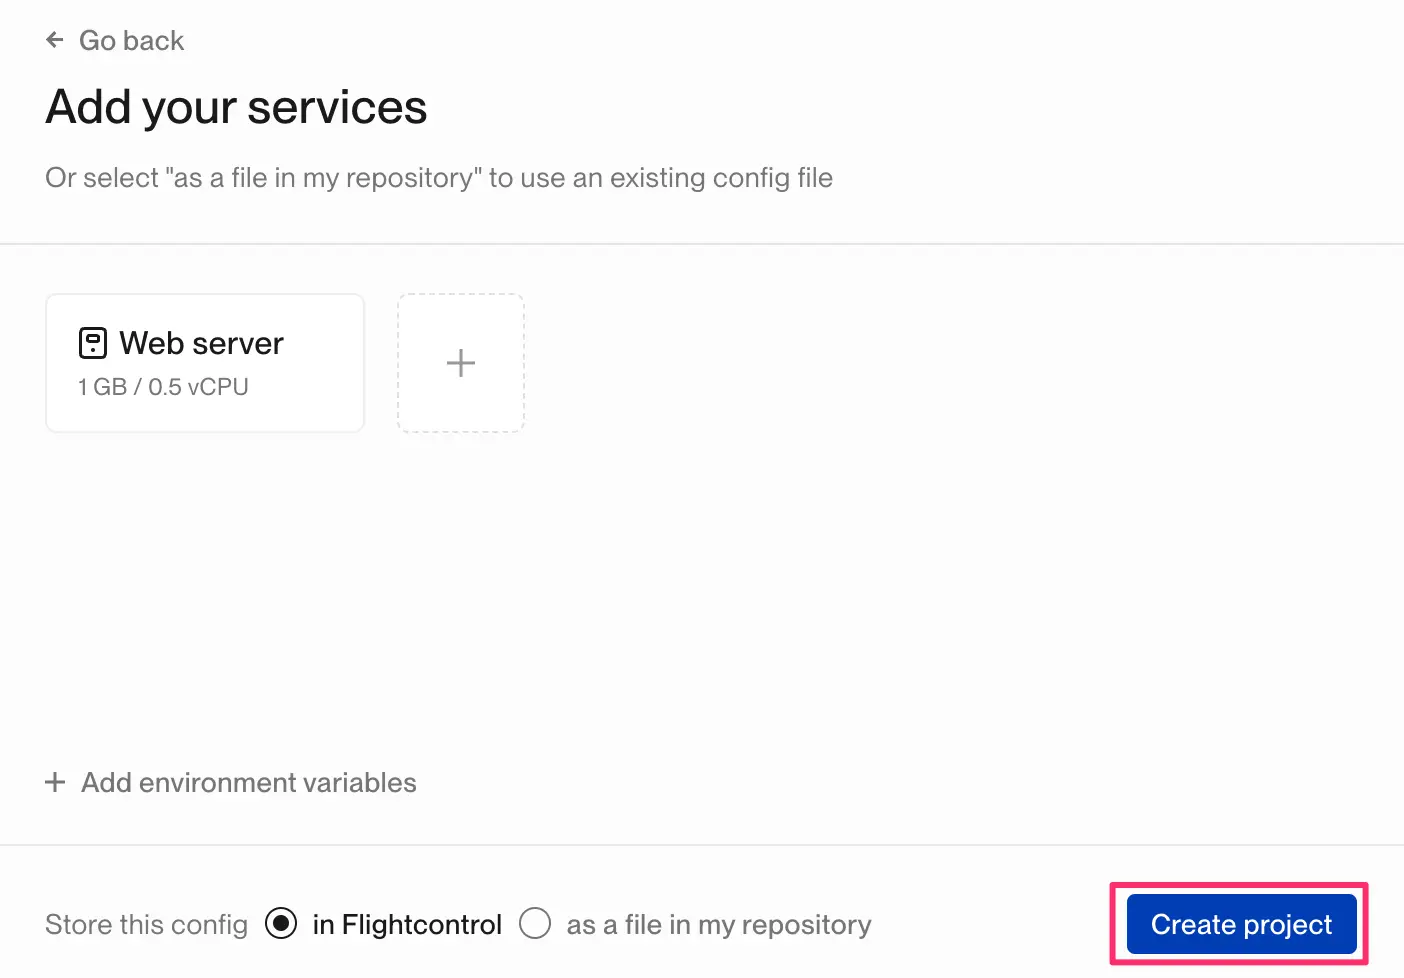
Now, you can add any additional services or set any required environment variables for your project if needed.

Once you have everything set up, it’s time to get your project to AWS!
Click Create Project to start the deployment process.
Flightcontrol will build your project’s container image using the Dockerfile you provided. Flightcontrol then deploys your project to AWS ECS, and creates a load balancer to route traffic to your application.
Automated Flightcontrol Deployments
When your Git repository is updated with new commits on the branch that Flightcontrol is watching, Flightcontrol will automatically start another build and deployment process for you. Typically, this would be the main branch, but you can change this in the dashboard.
Next Steps
From this start, you should be able to get your Dockerfile-based project deployed to AWS using Flightcontrol as the build and deployment pipeline.
You can add databases, Redis servers, static sites, or workers to your project as well. Flightcontrol will provision these services for you with AWS.
Troubleshooting
When Flightcontrol builds your application, if there are any errors from the Dockerfile, they will appear in the Building section for each deployment.
If something fails during your deployment, check the logs in the Deploying section
With any problems, please contact Flightcontrol support and we will be happy to help you get your project deployed.